AlphyCiti Business Solutions

A Step-by-Step Guide to Preparing Your Office for Fumigation

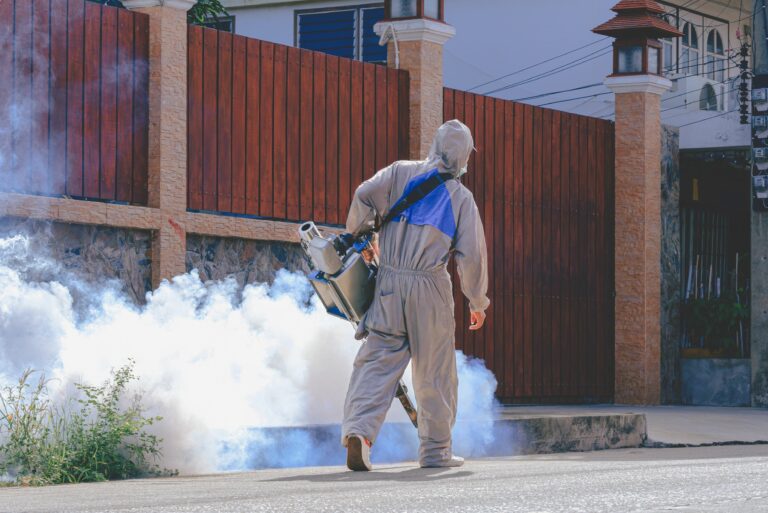
Fumigation is an effective way to eliminate pests from your office space, but it requires thorough preparation to ensure the process is safe and successful. Proper preparation not only protects your employees and office equipment but also enhances the effectiveness of the fumigation treatment. Here’s a step-by-step guide to preparing your office for fumigation:

Step 1: Notify Employees and Schedule the Fumigation

1.1 Inform Your Employees:

  • Notify all employees about the upcoming fumigation well in advance. Provide details about the date, time, and duration of the fumigation process.
  • Communicate the importance of vacating the premises during the fumigation and when it will be safe to return.

1.2 Schedule the Fumigation:

  • Choose a time for fumigation that minimizes disruption to your business operations, such as over a weekend or during a holiday.
  • Coordinate with the fumigation company to ensure that the timing aligns with your business needs.

Step 2: Secure and Protect Important Documents and Equipment

2.1 Protect Sensitive Documents:

  • Store important documents, files, and paperwork in sealed, airtight containers or move them offsite temporarily.
  • Consider backing up digital files and storing them securely to prevent potential damage from fumigation chemicals.

2.2 Protect Electronic Equipment:

  • Disconnect and cover all electronic equipment, such as computers, printers, and servers, with plastic sheeting or protective covers.
  • Ensure that all equipment is turned off and unplugged to avoid potential electrical hazards.

Step 3: Remove or Protect Food and Personal Items

3.1 Remove Food Items:

  • Remove all perishable food items from the office, including those stored in refrigerators, cabinets, and desks.
  • Seal non-perishable food items in airtight containers or remove them from the premises to prevent contamination.

3.2 Secure Personal Items:

  • Encourage employees to take home personal items, such as water bottles, mugs, and desk decorations, to prevent them from being exposed to fumigation chemicals.
  • Any personal items left behind should be stored in sealed containers or covered securely.

Step 4: Prepare the Office Space

4.1 Declutter the Office:

  • Clear the office of unnecessary clutter, such as paper stacks, boxes, and other items that could obstruct the fumigation process.
  • Ensure that all areas, including closets, storage rooms, and under desks, are accessible to the fumigation team.

4.2 Open Cabinets and Drawers:

  • Open all cabinets, drawers, and storage compartments to allow the fumigant to penetrate every corner of the office.
  • If there are any locked areas or rooms, make sure they are unlocked or provide the fumigation team with keys or access codes.

Step 5: Arrange for Temporary Relocation

5.1 Plan for Remote Work:

  • Arrange for employees to work remotely during the fumigation period. Provide them with the necessary tools and resources to continue their work from home.
  • Ensure that any critical business operations can continue without disruption during the fumigation.

5.2 Temporary Offsite Storage:

  • If there are items that cannot be protected adequately on-site, consider moving them to a secure offsite location temporarily.

Step 6: Secure the Building

6.1 Ventilation and Air Conditioning:

  • Turn off the HVAC system, fans, and air conditioning units to prevent the spread of fumigant fumes to unintended areas.
  • Close all windows and doors to ensure the fumigant remains concentrated within the office space.

6.2 Notify Neighbors:

  • If your office is located in a shared building or complex, notify neighboring businesses about the fumigation to avoid any inconvenience or confusion.

Step 7: Post-Fumigation Procedures

7.1 Ventilate the Office:

  • After the fumigation is complete, allow the office to be thoroughly ventilated according to the instructions provided by the fumigation company. This may involve opening windows and doors and running fans to clear out any remaining fumes.

7.2 Cleaning and Sanitizing:

  • Once it’s safe to re-enter the office, clean and sanitize all surfaces, including desks, countertops, and equipment, to remove any residue left by the fumigation process.
  • Dispose of any protective coverings used during the fumigation and ensure the office is ready for employees to return.

Step 8: Final Inspection

8.1 Inspect for Pest Activity:

  • Conduct a thorough inspection of the office space to ensure that the fumigation was successful and that no pests remain.
  • Look for signs of dead pests, and contact the fumigation company if you notice any issues that need further attention.

8.2 Resume Normal Operations:

  • Once the office has been cleaned, ventilated, and inspected, notify employees that it is safe to return to work.
  • Resume normal business operations with the confidence that your office is now pest-free.

Conclusion

Proper preparation is key to ensuring a successful fumigation process. By following these steps, you can protect your employees, secure your valuable assets, and create a safe and healthy work environment. Taking the time to prepare your office thoroughly will not only enhance the effectiveness of the fumigation but also minimize downtime and ensure a smooth return to normal operations.

Are you worried about the cleanliness of your space?

Let us help you! Cleaning services are our specialty, and we offer a complete range of cleaning and maintenance services. Get a free estimate!

Address

Eduarado Mocdlana Road, Accra, Ghana

Phone Number

+233 26 462 6010

Email Address

alphycbs@gmail.com
info@alphycbs.com

Request a Free Quote

Leave a Reply

Your email address will not be published. Required fields are marked *